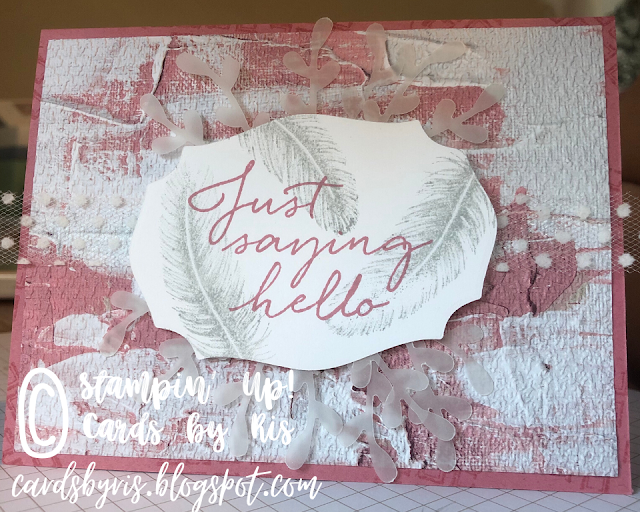
The New Annual Catalog was finally released yesterday and I got my first order in this morning! If you head to my Youtube channel or the Cards by Ris Facebook page you can check out all of the awesome things that came in the box. But here is the last card from my preoroder as promised!
Before we get to the instructions, here are my specials for the month! And don't forget that any order- no matter how big or small- will get you into into our next Facebook even on JUNE 30TH! Enter the host code -YQSX7ZAF- at checkout in the box that says host code to get the rewards below!
Any orders over $75 in the month of June will get you:
-3 cards and any refill of your choosing
Any orders over $100 in the month of June will get you:
-3 cards and any ink pad of your choosing
Any orders $150+ in the month of June will get you:
-5 cards and your choice of one of the following:
1) Take Your Pick Tool
2) Paper Snips
3) Playing with Patterns Enamel Dots
YouTube Link: https://youtu.be/SDvqWQluQpI
Steps to make this card:
1. Cut an 8.5"x 11" piece of Rococo Rose card-stock so that it is 5.5" x 8.5"
2. Cut a piece of paper from the IN GOOD TASTE Designer Series Paper to 5.25" x 4"
3. Using the TASTEFUL TEXTILE 3D Embossing Folder add texture to the piece of Designer Series Paper
4. Use adhesive to attach the Designer Series Paper to the card back- if you want it to be like the card below, then stamp the card-back first
5. Use adhesive to attach the White Tulle Ribbon across the back of the card
6. Cut out the label from a piece of Whisper White card-stock using the TASTEFUL LABELS DIES
7. Stamp the feather from the TASTEFUL TOUCHES Stamp Set with a Smoky Slate Classic Stampin Pad stamped off once
8. Paint the feathers with the Wink of Stella Glitter Brush
9. Stamp the sentiment from the TASTEFUL TOUCHES Stamp Set with a Rococo Rose Classic Stampin Pad
10. Use the Sprig Punch to punch out sprigs from a piece of Vellum
11. Arrange the sprigs to the label with adhesive
11. Arrange the sprigs to the label with adhesive
12. Finish it off by using Stampin Dimensionals to adhere the label to the card-back
Same card but with Versamark stamped on the card-back.


Comments
Post a Comment